NTUA Beamer is a Beamer class for NTUA-style presentations, with an optional cross-platform CLI for scaffolding and building decks.
If you already have a TeX distribution and only want to start writing slides, install the class first.
Unix-like shells:
curl -fsSL https://raw.githubusercontent.com/constatza/beamer-ntua/main/scripts/install-class.sh | shWindows PowerShell:
Invoke-RestMethod https://raw.githubusercontent.com/constatza/beamer-ntua/main/scripts/install-class.ps1 | Invoke-ExpressionAfter that, this is enough to start:
\documentclass[10pt,aspectratio=169]{ntuabeamer}

\title{My Presentation}
\subtitle{Optional subtitle}
\author{NTUA School of Civil Engineering}
\date{\today}

\begin{document}

\begin{frame}[plain]
  \makepresentationtitle
\end{frame}

\sectiondivider{Overview}

\begin{frame}{First Slide}
  Hello world.
\end{frame}

\end{document}
Compile with:
latexmk -pdf -interaction=nonstopmode -halt-on-error main.texYour PDF will be written to:
.build/main.pdf
If you want a ready-to-use starter project with local assets and a vendored standalone class:
texlua scripts/ntua-beamer.lua setup
ntua-beamer new talks/my-first-talk
ntua-beamer build talks/my-first-talk/main.tex
On Unix-like systems, setup installs ntua-beamer and ntuabeamer-class into ~/.local/bin by default. If that directory is not already on your PATH, add:
export PATH="$HOME/.local/bin:$PATH"The generated starter includes:
main.tex.latexmkrcntuabeamer.clsassets/
This path does not require a prior class install.
The class is intended to be usable directly, without needing the CLI.
\makepresentationtitle
\sectiondivider{Section Title}
\twocols{...}{...}
\threecols{...}{...}{...}
\framesource{key}{text}
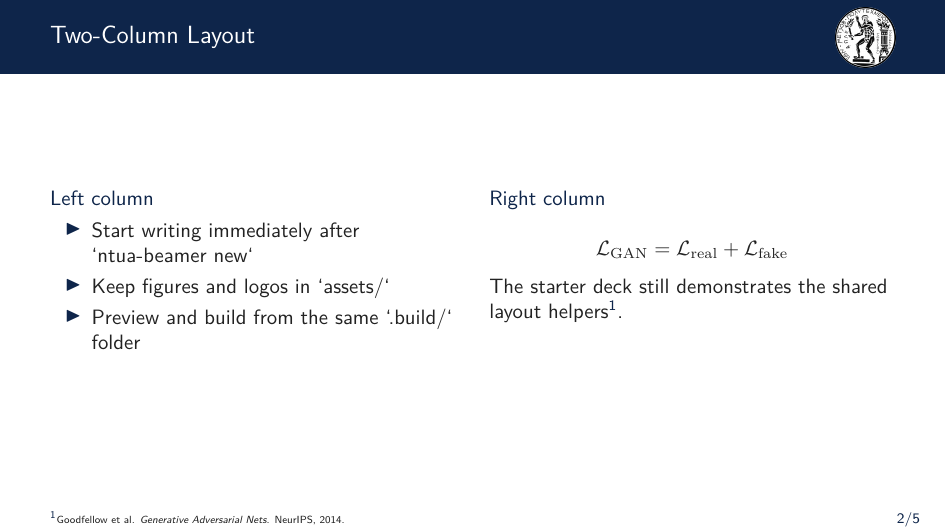
\framecite{key}\begin{frame}{Two-Column Example\framecite{goodfellow2014}}
\twocols{%
Left column content.
}{%
Right column content.
}
\end{frame}\framesource and \framecite provide per-frame reference marks in the footer.
\framesource{goodfellow2014}{Goodfellow et al. \emph{Generative Adversarial Nets}. NeurIPS, 2014.}

\begin{frame}{GANs\framecite{goodfellow2014}}
  Reusing the same key keeps the same mark\framecite{goodfellow2014}.
\end{frame}
If a deck uses biblatex, \framecite{key} can also fall back to \fullcite{key}.
Use \ntuabeamersetup{...} for normal deck-level customization.
\ntuabeamersetup{
  assetpath=assets,
  topleftlogo=assets/my-top-left-logo.pdf,
  toprightlogo=assets/my-top-right-logo.pdf,
  bottomleftlogo=assets/my-bottom-left-logo.pdf,
  bottomrightlogo=assets/my-bottom-right-logo.pdf,
  headerleftlogo=assets/my-header-left-logo.pdf,
  headerrightlogo=assets/my-header-right-logo.pdf,
}
Supported keys:
assetpathtopleftlogotoprightlogobottomleftlogobottomrightlogoheaderleftlogoheaderrightlogotopleftlogomaxwidthtopleftlogomaxheighttoprightlogomaxwidthtoprightlogomaxheightbottomleftlogomaxwidthbottomleftlogomaxheightbottomrightlogomaxwidthbottomrightlogomaxheightheaderleftlogomaxwidthheaderleftlogomaxheightheaderrightlogomaxwidthheaderrightlogomaxheight
Slot mapping:
topleftlogo: title slide top-lefttoprightlogo: title slide top-rightbottomleftlogo: title slide bottom-leftbottomrightlogo: title slide bottom-rightheaderleftlogo: frame header leftheaderrightlogo: frame header right
If you installed the class with the provided installer, or created a project with ntua-beamer new, the default logos are already available.
To omit a logo, set it to an empty value:
\ntuabeamersetup{
  toprightlogo=,
  bottomleftlogo=,
  headerleftlogo=,
}
To constrain unusually wide or tall logos, set a fit box with ...logomaxwidth and ...logomaxheight:
\ntuabeamersetup{
  headerrightlogo=assets/lab-logo.pdf,
  headerrightlogomaxwidth=1.3cm,
  headerrightlogomaxheight=0.8cm,
}
If a logo file is missing, the class omits that logo instead of failing the build.
The CLI is useful when you want a ready-made starter, explicit export commands, or a path-first workflow across arbitrary directories.
Bootstrap once:
texlua scripts/ntua-beamer.lua setupWorkflow commands:
ntua-beamer doctor
ntua-beamer new <directory>
ntua-beamer build [path]
ntua-beamer build --all [directory]
ntua-beamer export <path> --output <file-or-dir>
Behavior:
build [path]builds one root.texfilebuildwith no path finds the nearest root.texfrom the current directory upwardbuild --all [directory]recursively finds and builds every root.texfileexportbuilds one root file and copies the resulting PDF to an explicit destination- every build writes all artifacts into a sibling
.build/directory next to the source file
Examples:
ntua-beamer build talks/my-first-talk/main.tex
ntua-beamer build
ntua-beamer export talks/my-first-talk/main.tex --output out/If you want to package or install the class through the CLI instead of the one-line installer:
ntuabeamer-class package
ntuabeamer-class install
ntuabeamer-class uninstall
install copies the modular class bundle into TEXMFHOME, so:
\documentclass{ntuabeamer}works from arbitrary projects.
Required:
| Tool | Why |
|---|---|
| TeX distribution | Core LaTeX, Beamer, TikZ, fonts, and texlua |
latexmk |
Main build driver |
Optional:
| Tool | Why |
|---|---|
kpsewhich |
Resolves TEXMFHOME for class install tooling |
biber |
Needed only for decks that explicitly use biblatex |
Recommended distributions:
- macOS: MacTeX
- Linux: TeX Live with
latexmk - Windows: MiKTeX or TeX Live
Verification:
texlua --version
latexmk --version
kpsewhich beamer.cls- The class can be used in three ways: globally installed into
TEXMFHOME, copied locally next to a document, or vendored throughntua-beamer new. - The CLI is path-based and does not assume deck names or fixed project directories.
- CI generates a fresh starter project and publishes its PDF as a GitHub artifact instead of committing demo PDFs.